A complete guide to Android Auto


Android Auto
When you first launch Android Auto the screen can vary.
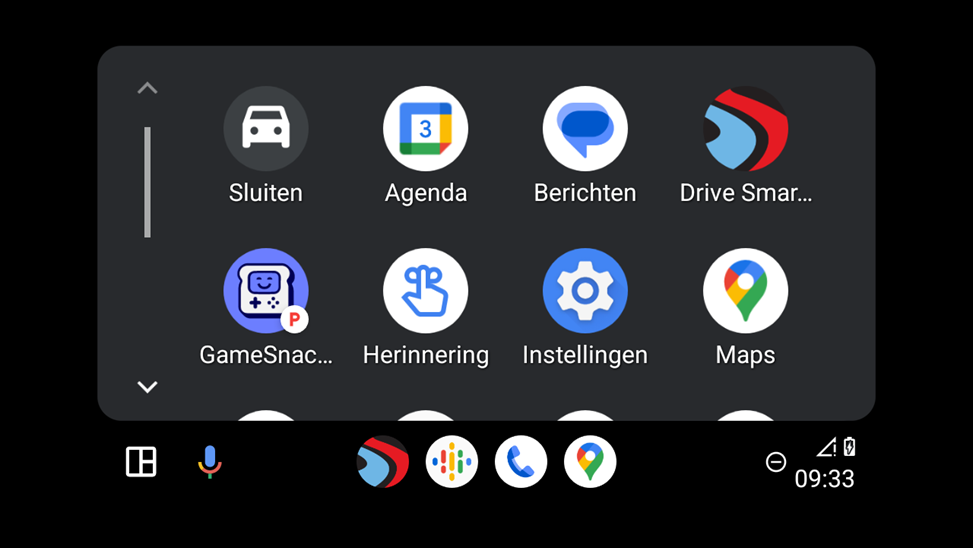
When you tap on the gallery icon in the bottom left corner, you will be presented with a screen that looks similar to:

Note: If Drive Smarter is not listed in the gallery, then uninstall Drive Smarter from your phone and reinstall. Then sign in on the phone before attempting to connect to Android Auto Again.
Tap on Drive Smarter to launch the application; the initial screen when Drive Smarter loads should look like this:

- Icons on the screen from top left to bottom right are as follows:
- Search/Destination Input - Initiate turn-by-turn navigation.
- Settings - Traffic View and Sound toggles.
- Map Orientation - Toggle to have the map spin to match the direction of travel, or always fix the map with North at the top and the vehicle indicator icon changing directions to indicate the direction of travel.
- Zoom In
- Zoom Out
- Report Button - Report police spotted, traffic jams, and other hazards.
- Posted Speed Limit - If in our Defender Database, the speed limit of the current road.
- MPH/KMH - The vehicle's current speed as gathered by phone GPS.
When you tap the search/destination input button, you can select between search, favorites, or an existing category.

By tapping Categories, you will be presented with a screen that looks like this:

- Under Categories, you will find common local destinations like:
- Gas Stations
- Restaurants
- and other points of interest
By tapping Search, you will be presented with a search bar and the keyboard will pop up.

Note: The keyboard can only be used for entering a destination and cannot be used while driving.
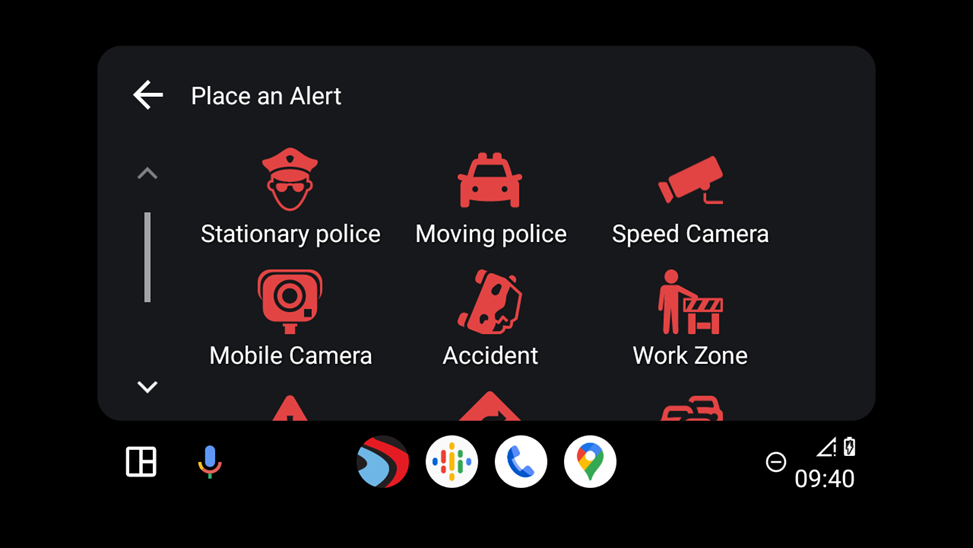
When tapping the Report icon the following screen appears:

Note: There will not be any secondary screen as with Apple CarPlay; all options are listed on the initial screen.
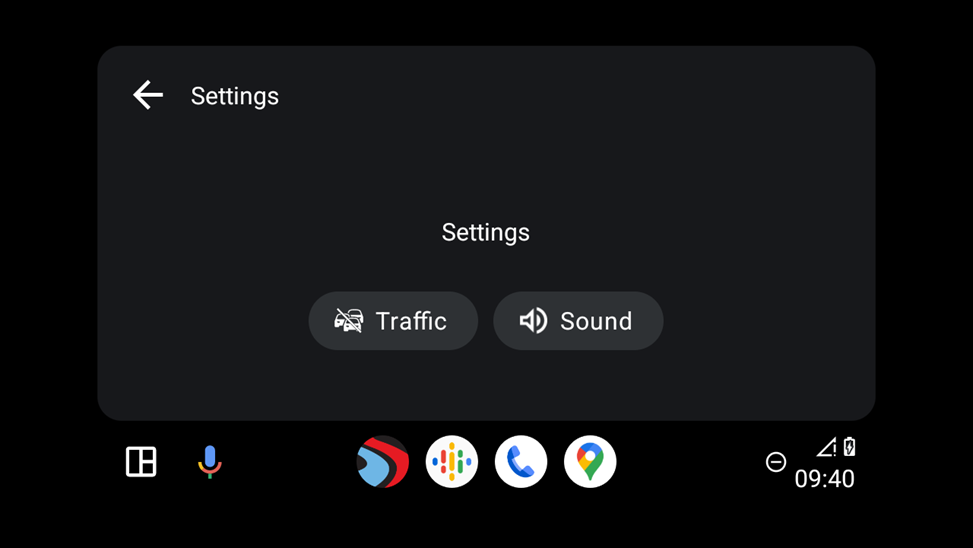
If you want to adjust the traffic view or turn the sound off, the Settings icon will display a screen like this:

- Traffic will toggle the traffic view on and off.
- This will display how congested roads are by color indication; with green being free of congestion, yellow being slowed traffic flow, and red being severely slowed or stopped traffic flow.
- Sound will mute all audio alerts coming from Drive Smarter.
When hit by a radar signal (picture shows a K-band), you will get a popup alert in the app.

- K and X bands alerts will not push automatically to other users; you must submit those alerts yourself with the "Police Spotted" button.
- Lock Out locks out the signal on the detector, which the detector will record the same as performing a Lock Out with the MUTE button on the detector or the SmartCord.
When encountering a cloud alert from another Community Radar user, you receive options to Verify Report if the threat is genuine or Not There to indicate the source threat is no longer present or was not genuine.
- Each of these options influences the lifetime of the alert. The lifetime of the alert also results in different colors indicating its quality and trustworthiness.

Laser, Ka, and other types of alerts work similarly, with the exception that these alerts are pushed to the cloud immediately without user intervention and are pushed to other Community Radar users for them to verify if the source is still there or not.
Important Notes
These are important notes when troubleshooting Android Auto
- Connecting a camera to Drive Smarter:
- Android Auto does not support Gallery/Live View while connected wirelessly. To connect to the Gallery/Live View in Drive Smarter, you can either disconnect from Android Auto or use a USB cable to connect to Android Auto instead of using Wi-Fi.
- Can you change the settings for a detector on Android Auto?
- Android Auto does not currently have any features that allow you to change the settings on a radar detector. Android Auto is simply taking Drive Smarter's navigational experience and Defender Database/Live alerts to a larger, more convenient screen. All other functionality remains in the phone/tablet app.
